Construct Your Community

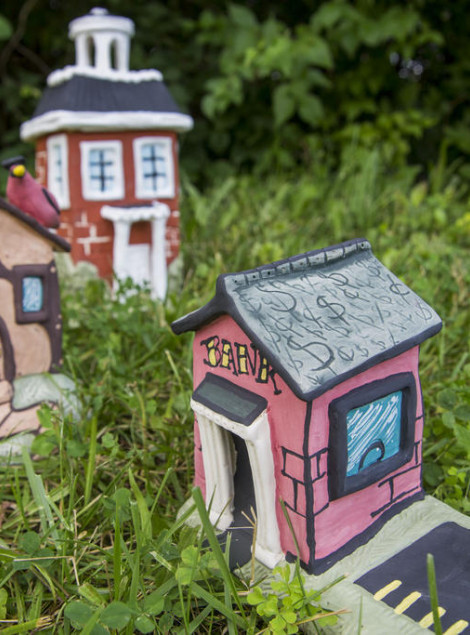
“Rome wasn't built in a day.” Towns and cities take a lot of planning and go through changes based on the economy and social trends. Imagine starting a whole new town - what kinds of buildings would you need? A grocery store, perhaps? Well, then you'll need a bank, too. A school? Better have a library in that case!! Have your students brainstorm and write a list of things your new town may need. When the buildings are complete, your class will have its own town to set up in the classroom or outside to photograph all while learning how towns are developed from start to finish!

Brainstorm
As a group, have your students come up with a list of buildings that towns always have! These can be as big as government buildings and malls to houses and flower shops, depending on what kind of town your class is interested in creating.
Research and Sketch
Once the list is finished, either assign each student one building to create or break the students into small groups to work as a team. They should research what kind of building they’ve been assigned - what do they usually look like? Are they usually brick? Do they have columns or a steeple? Using this information, they should draw a picture of what they want their building to look like.
Templates
Using the drawing as reference, have your students find all of the simple shapes that comprise the building and have them make templates with paper and scissors. These will act almost like stencils for cutting out puzzle pieces that create a building, so be sure to have the students keep their templates labeled and organized!
Slabs
Using a rolling pin or slab roller, create slabs for your students that they will use to cut out their template pieces. Let these slabs stiffen a bit before using for easier construction.
Form Base
To create a base for your building, pat out a hill or something similar. The example base was constructed solid with the intention of hollowing it out from beneath after it has set up a bit.
Cut Out Pieces
Once the slabs have stiffened properly, the students should cut out the parts using the templates they made. For ease of assembly, they should bevel the edges of the pieces so they fit together at an angle rather than edge-to-edge. (Accuangle makes this easier.)
Slip, Score, and Assemble
The students should carefully slip and score their pieces and join them together – be sure that they properly compress their work so it does not crack while drying or firing!
Adding Details
Using pinching, coils, sprig, carving, and other techniques, the students can add details and decorations to their pieces. This can be anything from windows and doors to bushes and signs! These extra details will help bring their unique town to life!!
Underglaze
As the pieces dry out, have your students pick out different underglaze colors they wish to use to decorate their buildings. Since the work is still green, it is important to handle it with care. This is a great way to decorate because methods like mishima and sgrafitto can still be used.
Bisque Fire
Once the pieces are completed, allow them to become bone dry and then bisque fire them to cone 04. Return them to your students for glazing if they wish to include glossy surfaces. Refire the glazed buildings to cone 05.
Build That Town!!
When your town is all fired, it is ready to be set up in the classroom or outside for pictures! Let your students share their buildings and what they learned with their peers as part of the experience. If the students worked in groups, have them work together to figure out a good place to keep the buildings. If they made their own, allow them to take the buildings home!

