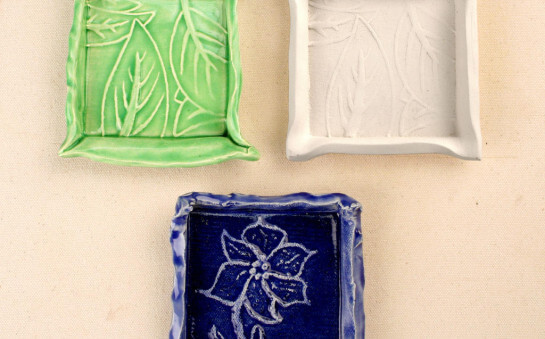
Positive and Negative Printmaking on Clay

Explore positive and negative space through ceramic printmaking! In this lesson, students create foam printing plates and use AMACO Ceramic Printing INKs and Velvet Underglazes to layer bold patterns, color, and contrast onto bisque tiles. This process combines drawing, design, and surface decoration techniques to create dynamic ceramic artwork inspired by traditional printmaking methods.
Supplies List
- AMACO 6"x6" Bisque Tile
- AMACO Velvet Underglazes
- AMACO Ceramic Printing INKs
- AMACO LG-10 Clear Transparent
- X-Acto Knife or Scissors
- Brayer
- 3mm Craft Foam Sheet (two 3"x3" squares per person)
- 2mm Adhesive Craft Foam (one 3"x3" square per person)
- Masking Tape
- Pencil, Pen, or Permanent Marker

Draw Your Design
Draw your design onto the adhesive craft foam sheet using your pencil, pen, or permanent marker.
Peel and Stick
Peel the backing off the adhesive craft foam and stick it to one of the thicker craft foam sheets.
Note: For younger students, they will need to cut out their design with scissors before sticking to the thicker craft foam.
Cut on the Line
Use an X-Acto knife to cut on the lines, cutting through the top layer of the craft foam, but not the thicker craft foam.
Create Your Printing Plates
Remove some of the shapes and press them firmly to the second piece of thicker craft foam to create your positive and negative design.
Create a Velvet Underglaze Wash
Mix Velvet Underglazes with water to create a wash. It should be the consistency of watercolor.
Add a Velvet Underglaze Wash
Draw in areas you would like to add color (pencil marks will burn off during firing). Use an AMACO Fan Brush to add the Velvet Underglaze Wash.
Roll Out AMACO Ceramic Printing INK
Take your AMACO Ceramic Printing INK and place a small glob on a flat surface. Roll out the INK so the brayer is completely covered.
Ink Your Printing Plate
Roll the inked brayer onto your printing plate.
Print Your Tile
Place your printing plate face down and press firmly to transfer your design to the tile. Lift up carefully to avoid smearing. Alternate printing plates for the positive/negative design.
Add Clear Glaze
When the tile is completely dry, sponge or brush on 1-2 coats of LG-10 Clear Transparent glaze and fire to cone 05.