Self-Portrait as Famous Artist
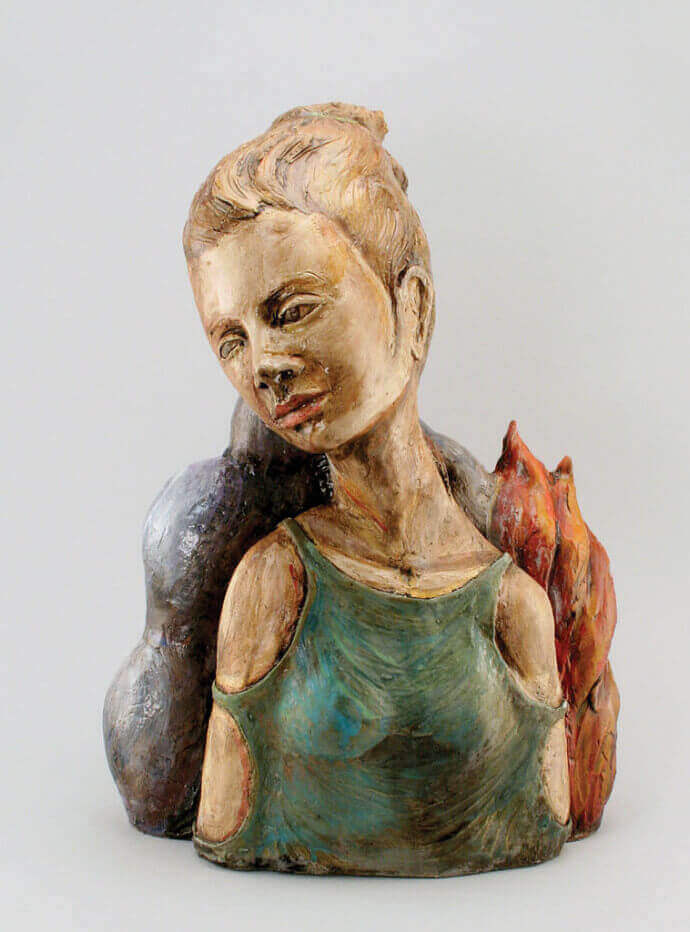
Creating ceramic figurative sculpture using slabs and coils.
Self-portraiture is prevalent in the Art History tradition as many artists discover that the one model they can always count on is themselves. Rembrandt and Van Gogh are well-known for painting many self-portraits throughout their careers. Self-portraits are as varied as the painters who paint them. Every painter brings a new vision to the self-portrait tom posture, palette, and painterly textures to props and symbolism.
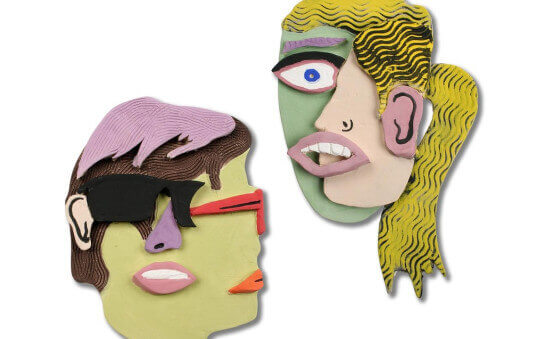
In ceramics as well, artists are inspired by self-portraiture. Most notably, Robert Arneson used the style, colors, textures and forms of specific painters to reinterpret two-dimensional art forms as a three-dimensional sculpture.
These building and decorating techniques can be used for a wide variety of sculptural forms, and also for creating large-scale vessels.
Supplies List
- Off-White Sculpture/Raku Clay No.27 Moist
- Terra Cotta Stoneware Clay No.77 Moist
- Scoring Tool
- Glaze Brushes
- Tool Hardwood No. 7 Spec
- Velvet Underglazes
Background Preparation
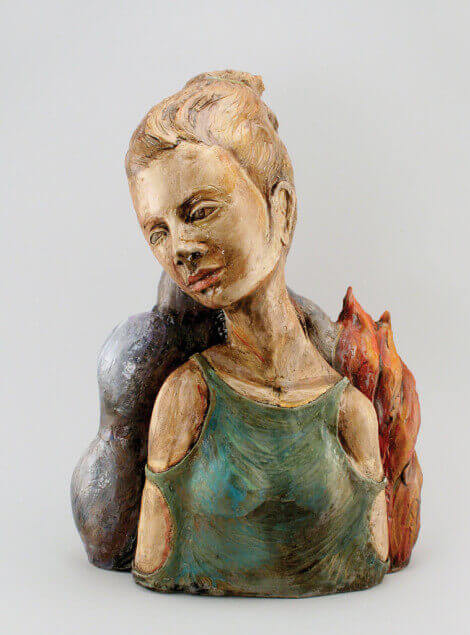
Assist students in selecting an artist to research. Portrait artists are recommended for first projects but advanced students could be further challenged by applying the ideas of non-figurative artists into creating portraits reflecting their styles.
Suggestions for painters include Picasso, Frida Kahlo, Kandinsky, Dali, Goya, Manet, Francis Bacon, and Rembrandt.
Introduce the project with examples of figurative ceramic artists, including: Adrian Arleo, Robert Arneson, Viola Frey, Arthur Gonzalez, Marylou Higgins, Sergei Isupov, Christy Keeney, Anthony Natsoulas, Richard Shaw, Akio Takamori, Noi Volkov, and Patti Warashina. Each student should distill their chosen painter’s conventions and styles into a few words. For example, the elements of Van Gogh’s paintings may be summarized by “Texture, Acidic Colors, and Intense Gaze”. De Chirico’s may be “Line, Architecture and Representative Forms”.
Determine desired scale of assignment, whether life-sized, half, etc. (keep in mind that the larger the bust, the more challenging and time-consuming the project). Sketches of the general form, texture and color should be done on paper with that scale in mind.
Demonstrate slab and coil-building techniques for building a hollow form with interior supports as necessary.
Busts should be constructed with the artists’ styles and the preliminary sketches in mind. Each student should use themselves or their classmates as models to insure appropriate form and proportion.
Cut Slab Base
Start construction by cutting a flat slab base to the desired contour and size, laying it on a porous board or on a doubled sheet of newspaper. Remind each student to sign their name into the underside of the slab and cut a 1″ round hole in its center for air to escape (as it will be difficult to flip the sculpture over after construction begins).
Recommended wall thickness is 1/2″- 3/4″, depending on the size of the sculpture. (Walls may be slightly thinner when reaching the top of the piece, but extremes of thick and thin should be avoided).
Build on Base
After scoring & slipping the edges, place the first strip of clay on top of the base (not around it) for best support. Build the sides of the form up using either slabs or coils, or a combination of both. Slab strips can be cut to the width and shape that is appropriate to the desired form. Always “stitch” or mesh seams together well and put coil along inside of seam for additional strength.
Shape Torso / Shoulders
Shape the torso by adding slabs or coils and coaxing the walls while supporting with the other hand. “Darts” or cutouts may be created to achieve deeper indentations.
Build Internal Supports
To create the shoulders and neck, construct internal structures to help support the weight through construction and firing. Added slab supports should be the same consistency as the rest of the sculpture to avoid stress cracks. Be sure to make holes in any supports which may trap air, or there can be disastrous kiln blow-outs. Note: Do not pack the interior with newspaper as this gives very little structural support while building, none while firing, and can shorten the life of electric kiln elements.
Build Neck and Chin
Build the neck as a tube and attach the chin as a “chevron” tilted up. Let the underside of the chin set up before adding the weight of the head (this would be a good stopping point before the next class). 7. Once the neck has set up enough to support the weight of the head, continue to build up until reaching the hairline. At this point, before enclosing the head, the features should be modeled and sculpted. Begin by sketching the location and shape of the features.
Clothing
Make clothing as part of the form, then add texture to show the drape or edges. Here a coil is added to define the neckline of the dress.
Face
When the chin is firm enough to support some weight, add slabs and sculpt the face.
Features: Eye Sockets
To sculpt the eyes, push in at the inner corners using two fingers while pushing out the bridge of the nose. Push out the eyebrows and nose from the inside.
Finishing Features
Use modeling tools to finish sculpting the nose, eyes, and mouth adding clay where needed. Try not to add large clumps of clay, as there is a risk of uneven drying, cracking, and even blowouts. Try to keep the thickness of the head even all around.
Features: Nose
For the nose, cut an upside down “T” starting at the top of the nose, and then add a strip of clay to create the desired size and shape.
Closing the Head
After the features have all been completed, close up the head by building it a little pointier than desired, then seal it up tightly. Gently paddle into shape.
Hair
Hair is best sculpted as a form, rather than as individual strands (which are likely to break off and look odd). Slab or coil build the shape of the hair, and texture with whichever tools seem appropriate – combs, forks, wood tools, brushes, etc, can all be used to give the hair a naturalistic appearance. Texture the outside of the bust if desired although it is best to texture or add elements while building. If texturing is left until late, the bottom and top will appear different due to the variations in stiffness and consistency of the clay.
Underglaze and Bisque
Velvet Underglazes may be applied to the bust before bisque firing, preferably at the bone dry greenware stage. These can be used as an “under painting” or for final decoration. Allow the completed sculptures to dry slowly and evenly before bisque firing to cone 04. Larger and thicker pieces should be fired more slowly (10-12 hours).
Ideas for Glazing
After bisque firing, more underglazes and selected glazes can be applied to achieve the desired effect before the final glaze firing. Alternately, the piece could be left with the matt underglaze and clay surface as long as it is not going to be displayed outdoors. Various artists finish their surfaces by applying glazes and color in different thicknesses and techniques so the style of the chosen artist should be kept in mind.
Glazing
To achieve the surfaces shown in this lesson plan, glaze the bisqued pieces as follows: a) The first step in glazing is to wipe off dust and debris using a clean damp sponge to help prevent glaze crawling. Sponge off all surfaces and do not saturate the piece or rinse it under running water, as it would absorb so much water it would cause the glaze not to stick well. b) Brush on a thin coating of a dark colored underglaze on the bisqueware and then sponge it off. Sponging leaves some underglaze in the crevices and textural interstices, giving the piece more visual depth and accentuating the texture. For detailing and design work, more underglazes are painted on after this step (as done with the flames, to make a greater contrast). c) Apply 1-2 coats of a gloss or matt clear glaze and fire to Cone 06- 05. (LM-10, AMACO Liquid Matt is recommended as it enhances the underglazes without a shine detracting from their colors).
Glazing Tip
Colored glaze can be used over some (or all) areas of the piece, as done with the white glaze on the clouds. Keep in mind that wherever one glaze is applied over another, the end result may by unpredictable, and may not look like either of the original glazes. If the two glazes react badly, they may also run, so any layering for glazes should be nearer the top than the bottom. Also, when layering glazes, the glazes will run together, so this technique is not suitable for areas of color requiring crisp lines.
Using Non-Figurative Artists as a Source
If students are particularly drawn to artists who do not paint the figure or portraits, but are perhaps abstract painters — for example, Kandinsky, Pollock, or Monet—encourage them to use the artist, but perhaps incorporate the patterns and paint quality in a sculptural form. If they were to make the painting into a sculpture, how would that be accomplished? Robert Arneson was famous for assigning his students to make a sculptural form from a painting, using all angles and all of the painting. Pictured is a self-portrait as a Rothko.


