
Reduction Prints with AMACO Ceramic Inks

Use easy-to-find packing material and craft foam to create colorful prints on bisque using AMACO Ceramic Printing Inks. This flexible printing process can also be used on moist clay to make impressions and prints. Discussions will include how Picasso first developed this technique with linocuts.
Supplies List
- AMACO Ceramic Printing Inks
- AMACO Velvet Underglaze
- AMACO LG-10 Clear Transparent Glaze
- 2 Bisque Tiles, 6"x6"
- 3” Square Thick Craft Foam
- Sticky Backed Craft Foam
- Packing Foam
- Brayer
- Mist Bottle
- Permanent Marker
- Scissors
- Cup and Brush
- Baby Wipes
- Tape

Goals & Objectives
Reduction prints were developed by Picasso. This printmaking technique uses a single block, which is progressively carved and printed in multiple layers to create a multicolored image.
We will use craft and packing foam rather than blocks to create our multi-colored image that will be printed on bisqueware tiles. With each stage, more of the foam will be taken away, meaning earlier colors are literally reduced from the surface. The process continues, color by color, until the final layer is printed.
For the color, we will use AMACO Ceramic Inks. These printmaking inks are specifically designed for use on ceramics. They are great for screenprinting, craft foam printing, and monoprinting!
By the end of this lesson, students will be able to:
- Understand and explain the reduction printmaking process as it applies to both traditional paper printmaking and ceramic surfaces.
- Utilize color theory to plan and execute a series of color layers that produce depth and contrast in the final design.
- Analyze and critique their own work and the work of their peers, discussing the effectiveness of design, use of space, and color choices.
Principles & Elements of Design:
- Value - refers to the lightness or darkness of a color or tone.
- Analogous Colors - colors located adjacent to each other on the color wheel.
Glossary:
- Brayer - a small roller tool used to apply ink evenly onto a printing surface.
- Plate or Printing Plate - refers to the surface onto which an image is created or transferred for the purpose of making prints.
- Glaze Fire - To heat glaze materials at a temperature high enough to melt and form a glassy surface coating when cooled.
Prepare the Printing Plate
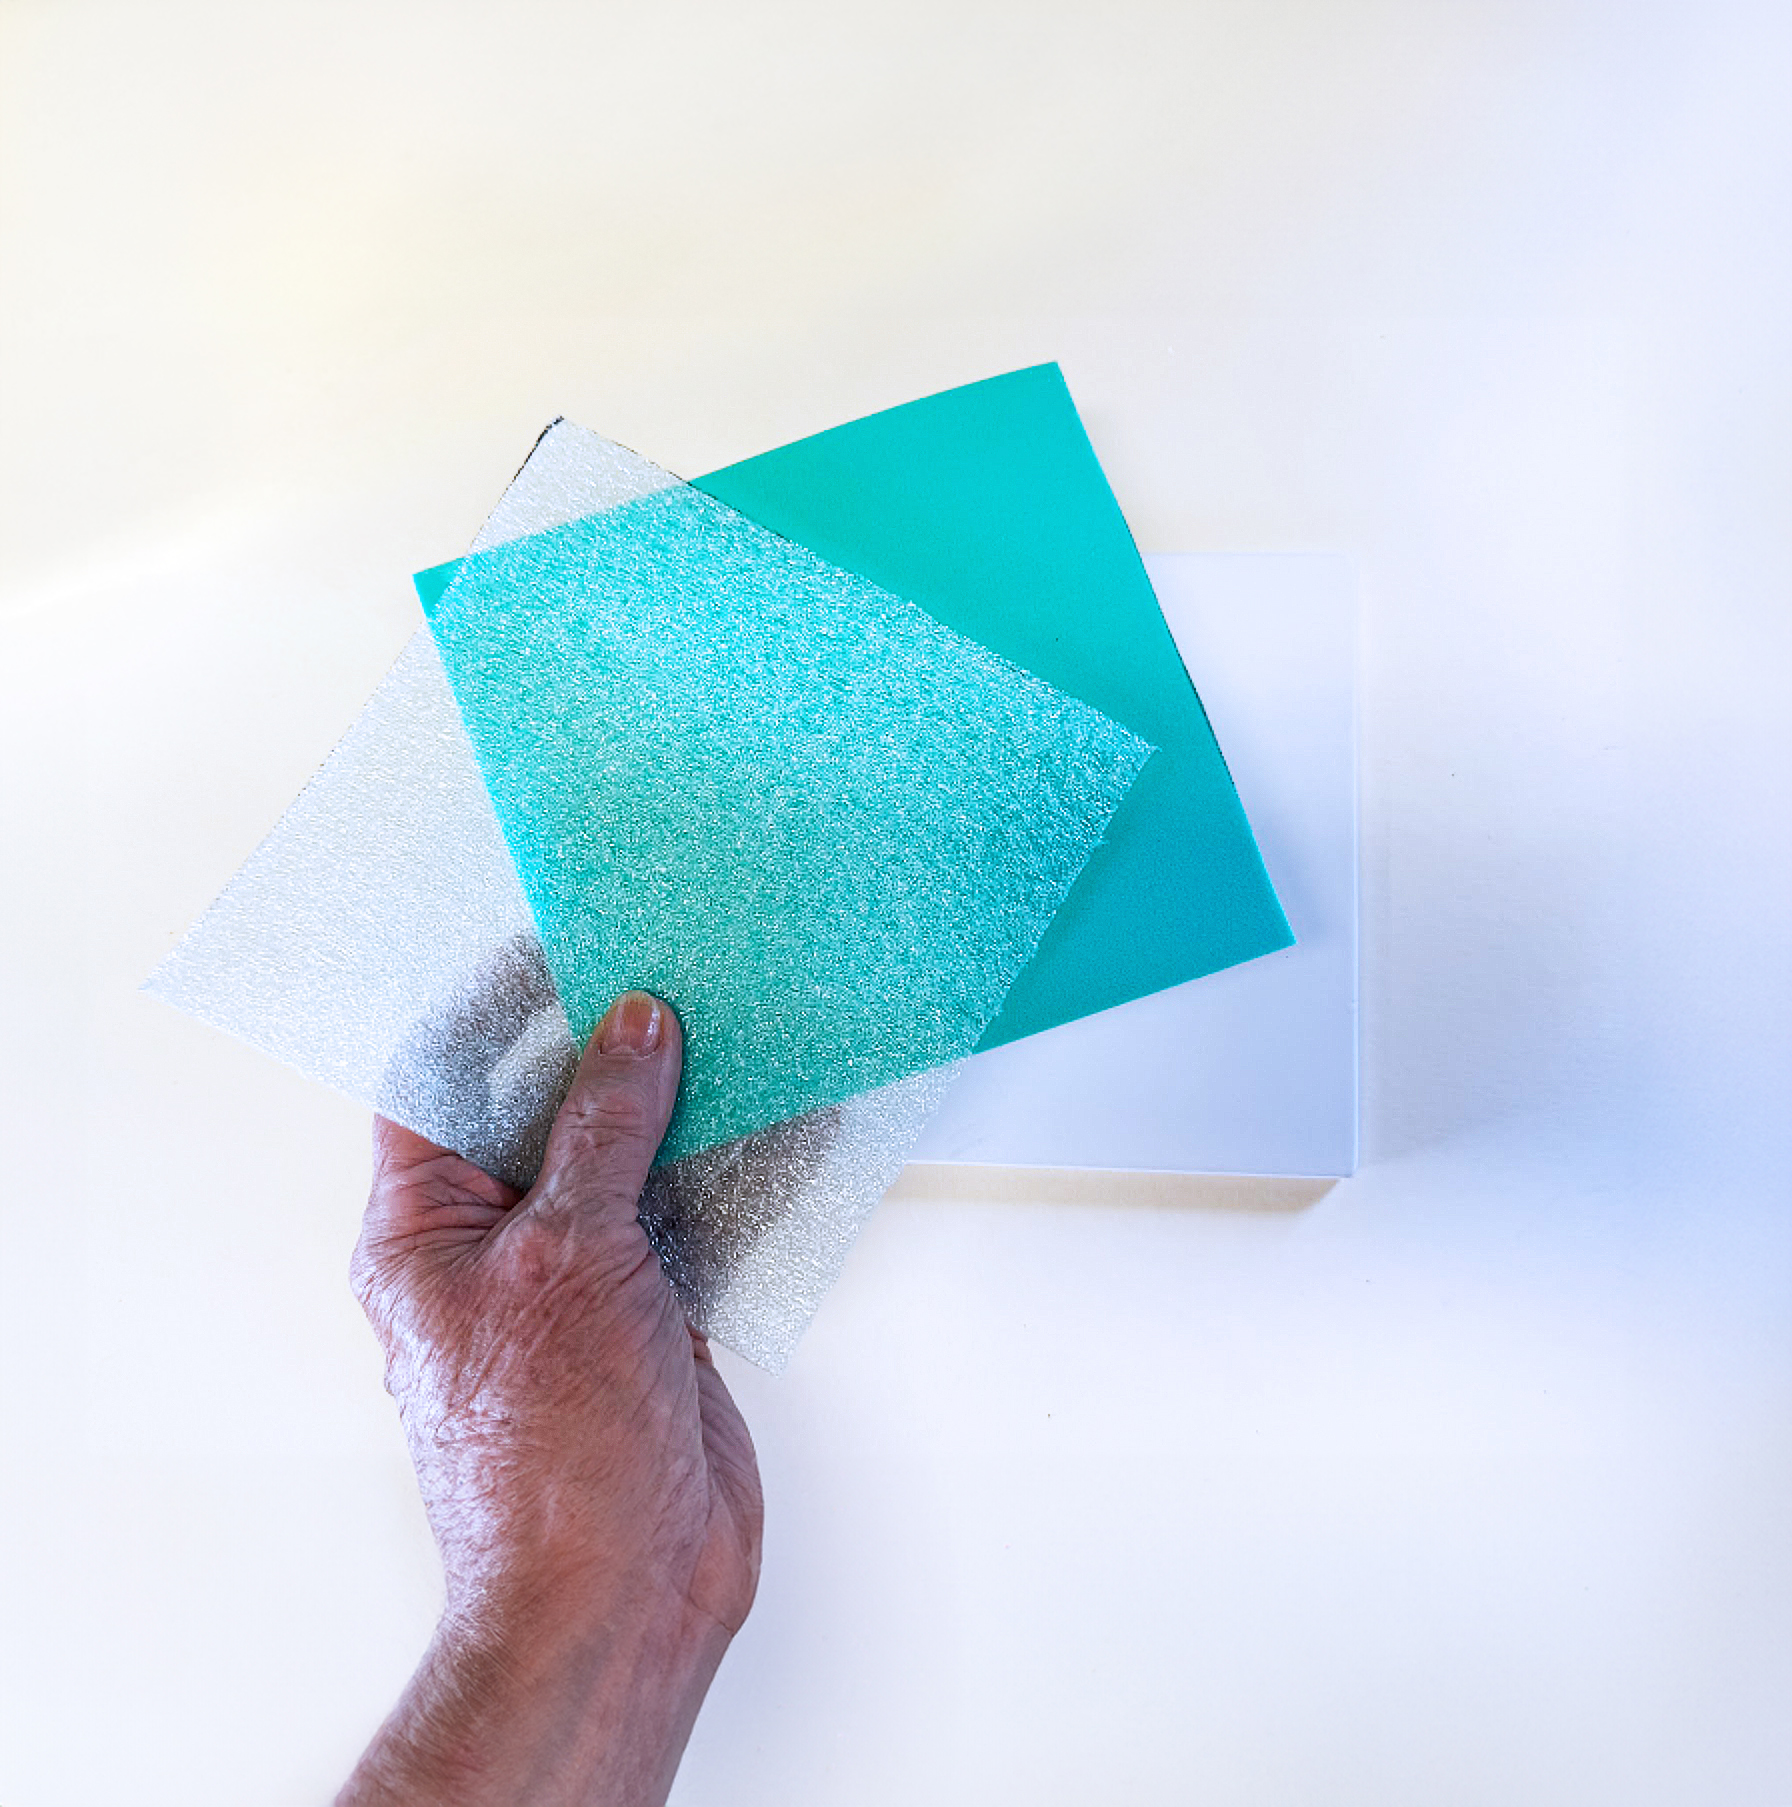
Cut sticky backed craft foam and packing foam to match the size of the 6"x6" low fire bisque tile.
Create a Border
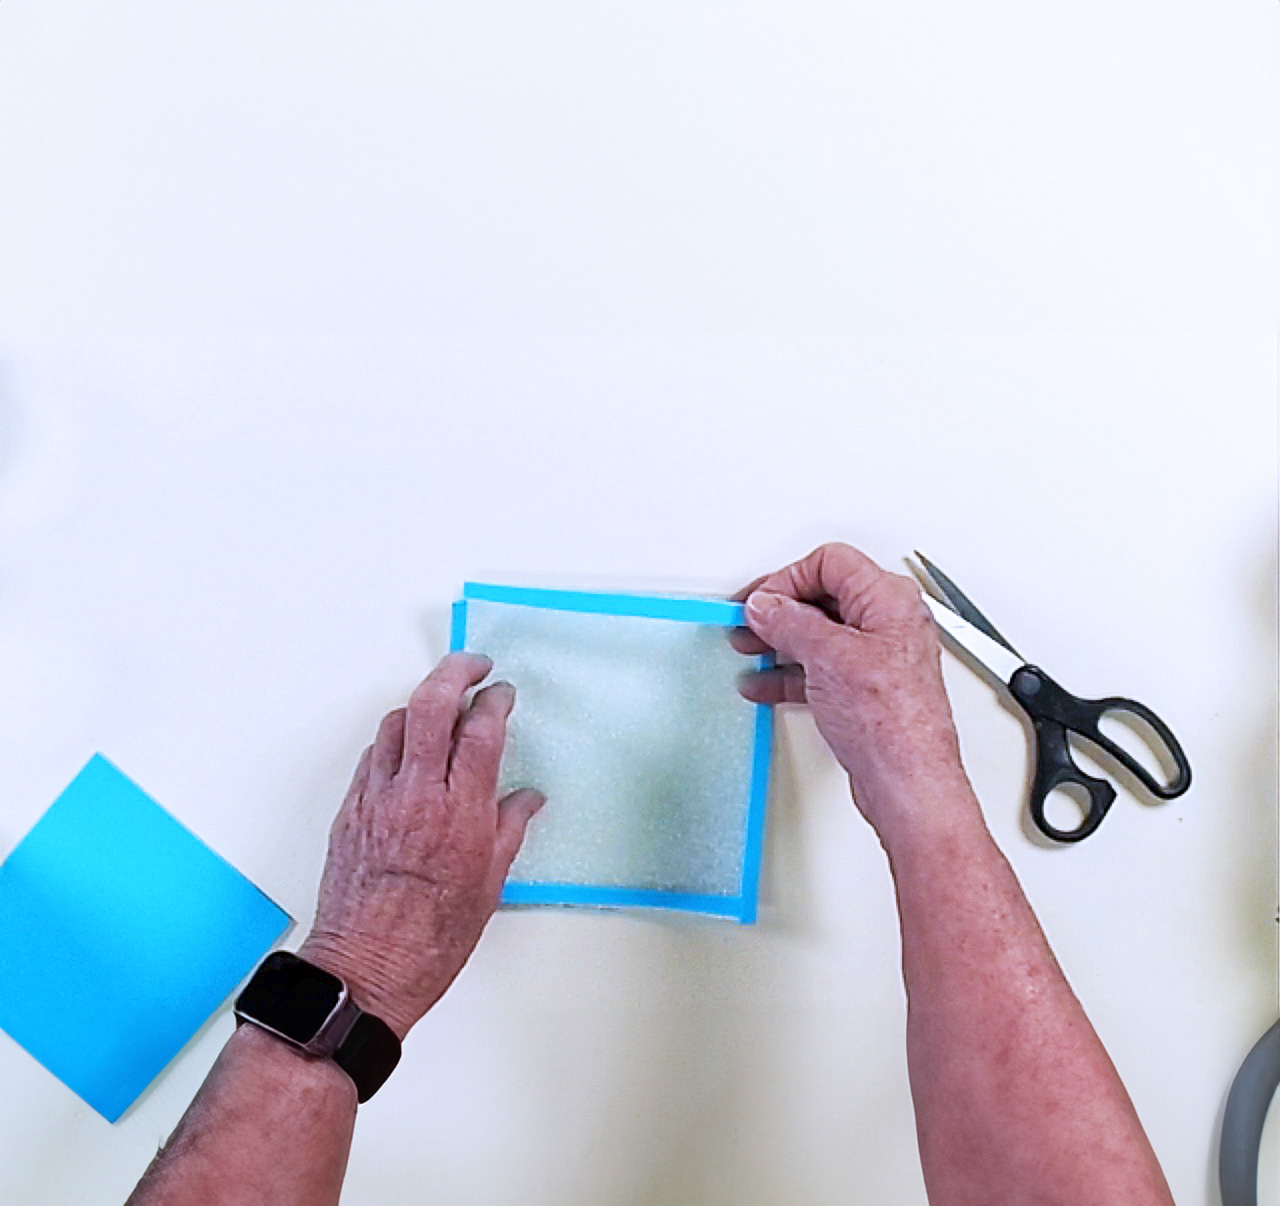
Cut four narrow strips from the sticky backed craft foam and press them onto the edges of the packing foam.
Add Large Shapes

Cut, peel, and stick two large shapes to the packing foam.
Add Medium Shapes
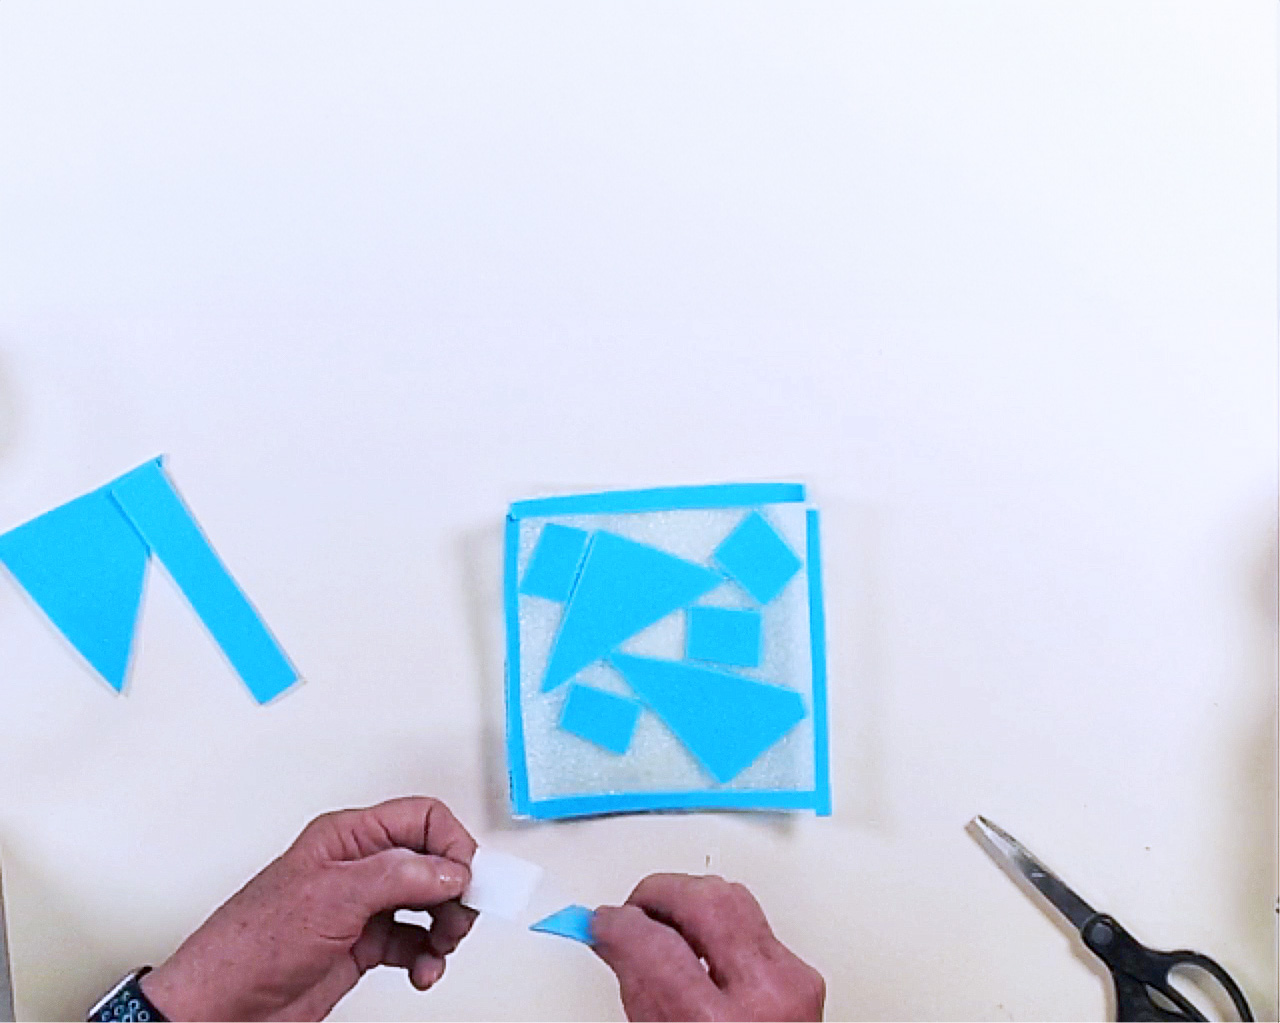
Cut, peel, and stick five medium sized shapes to the packing foam.
Fill the Space
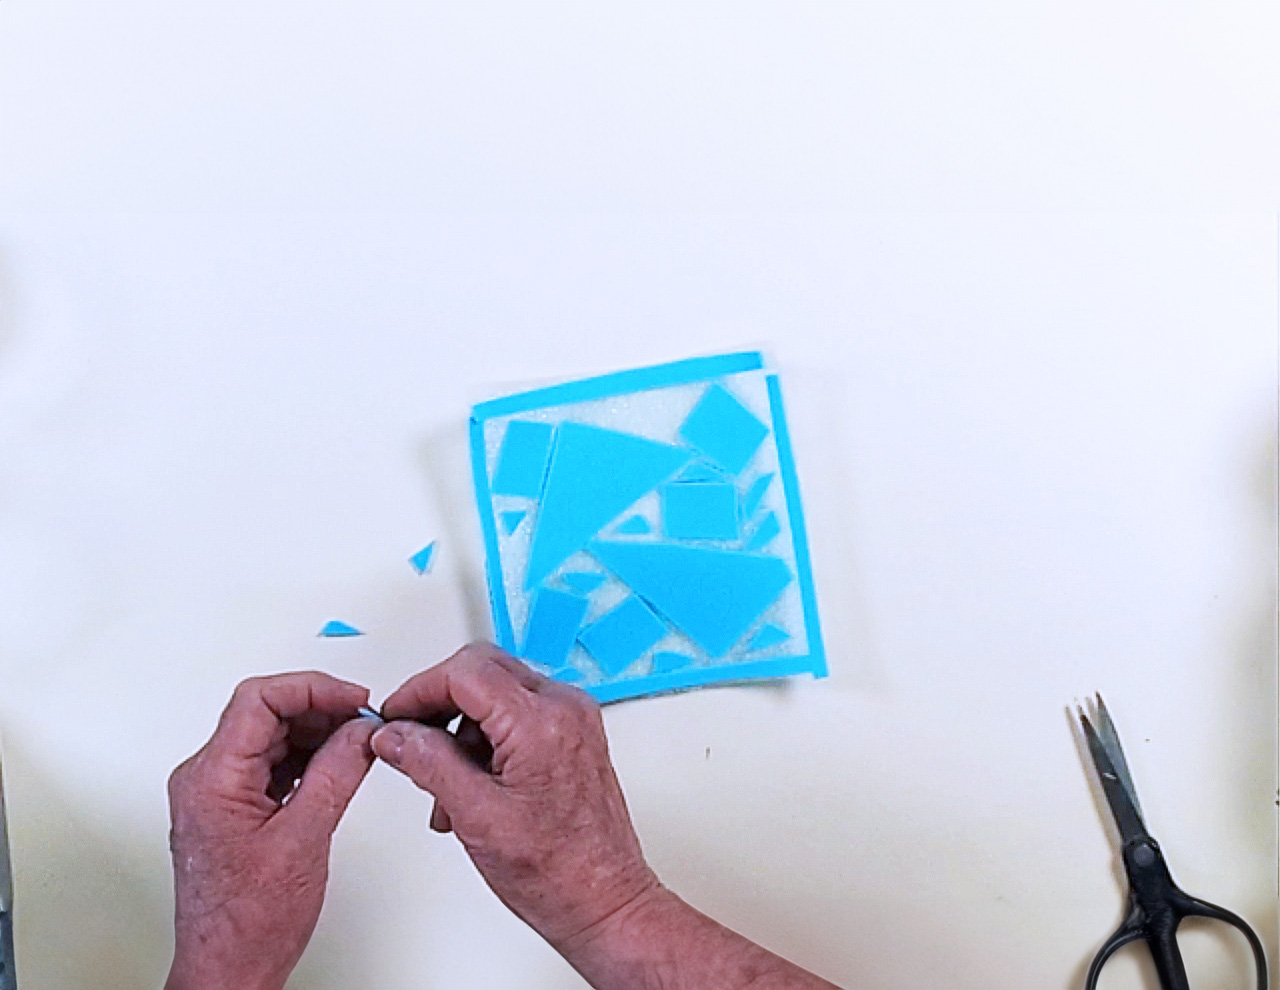
Cut small shapes to fill the background. The goal is to minimize the amount of negative space.
Apply Velvet Underglaze Base
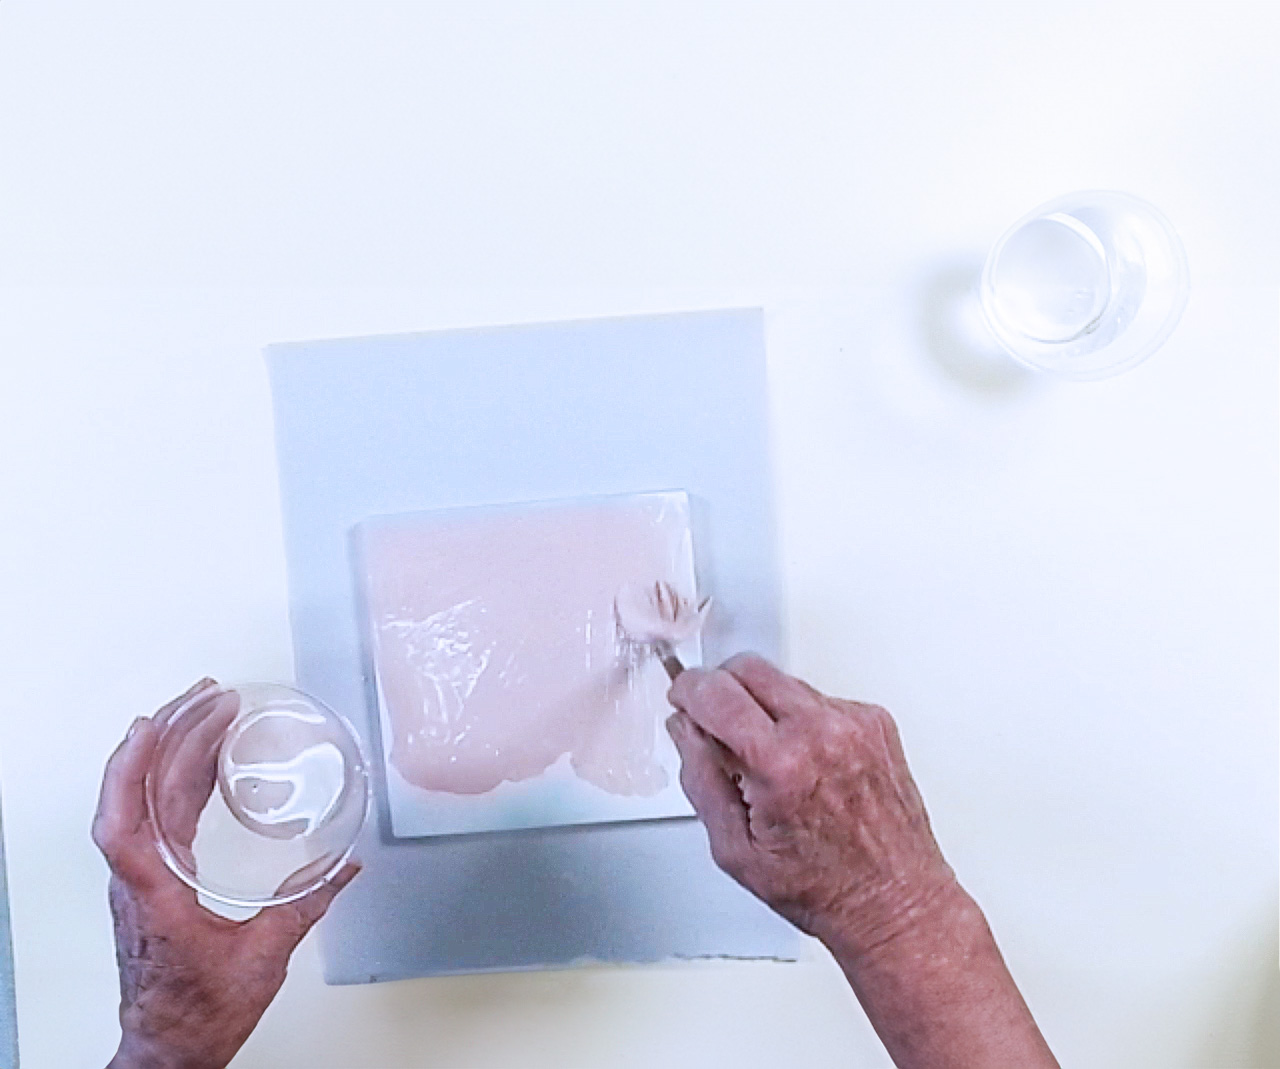
Mix a light AMACO Velvet Underglaze about 50/50 with water and liberally apply one coat to the tile.
[Suggested colors: V-324 Blush or V-329 Sea Glass]
Print the First Color
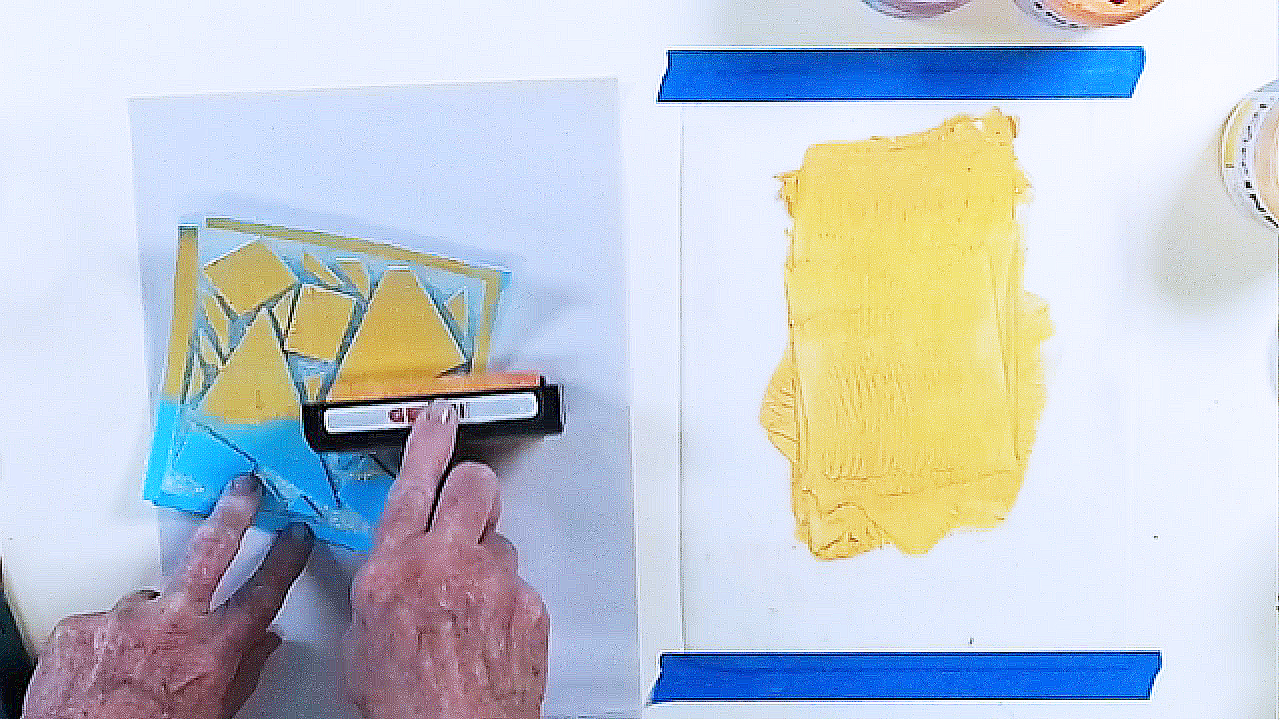
Use a brayer to evenly roll the lightest AMACO Ceramic Printing Ink color onto your custom printing plate.
Register & Transfer the Print
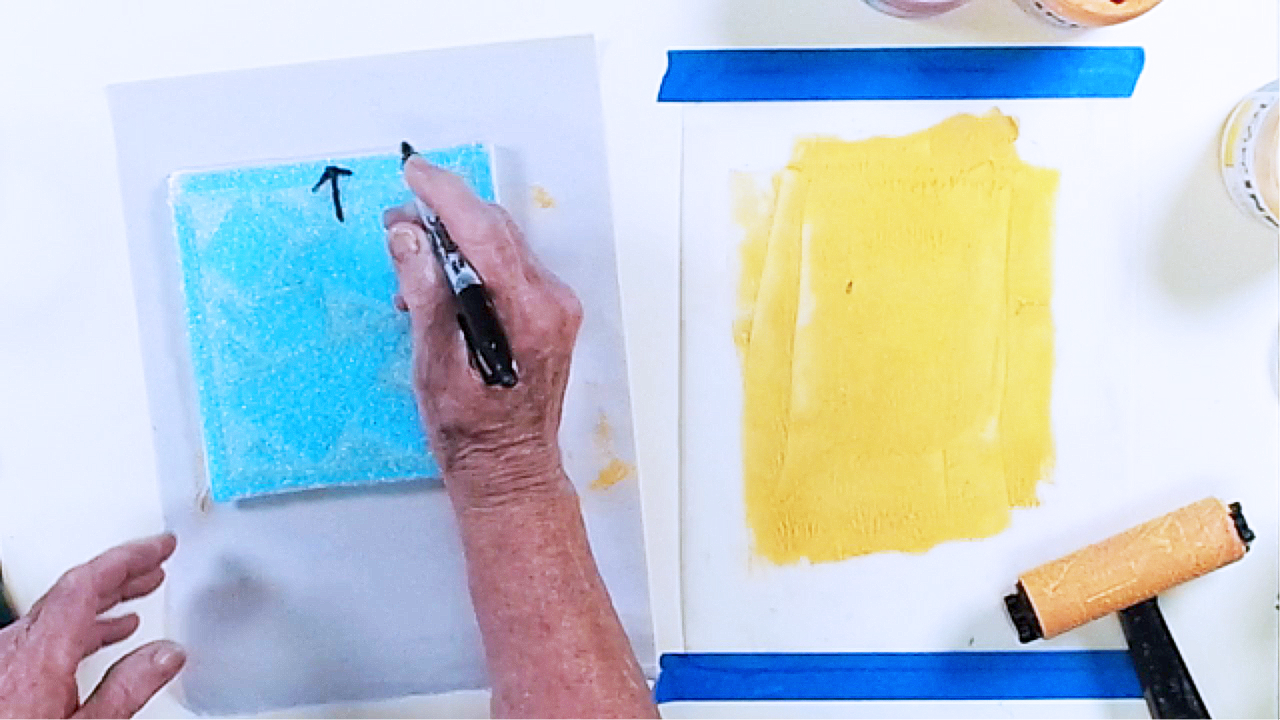
Place printing plate face down on tile. Draw an arrow on the back to show the top of the printing plate.
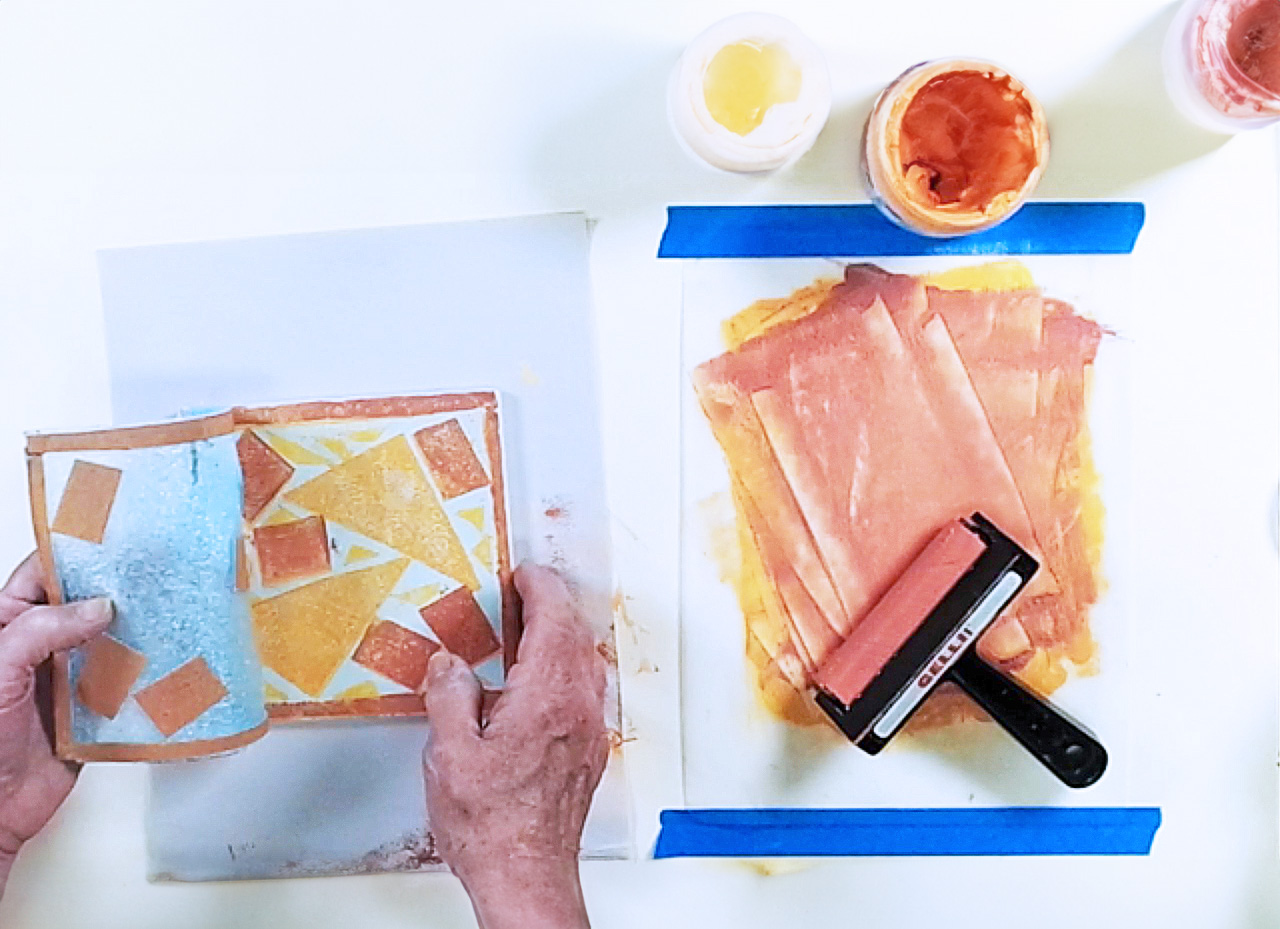
Reveal the First Print
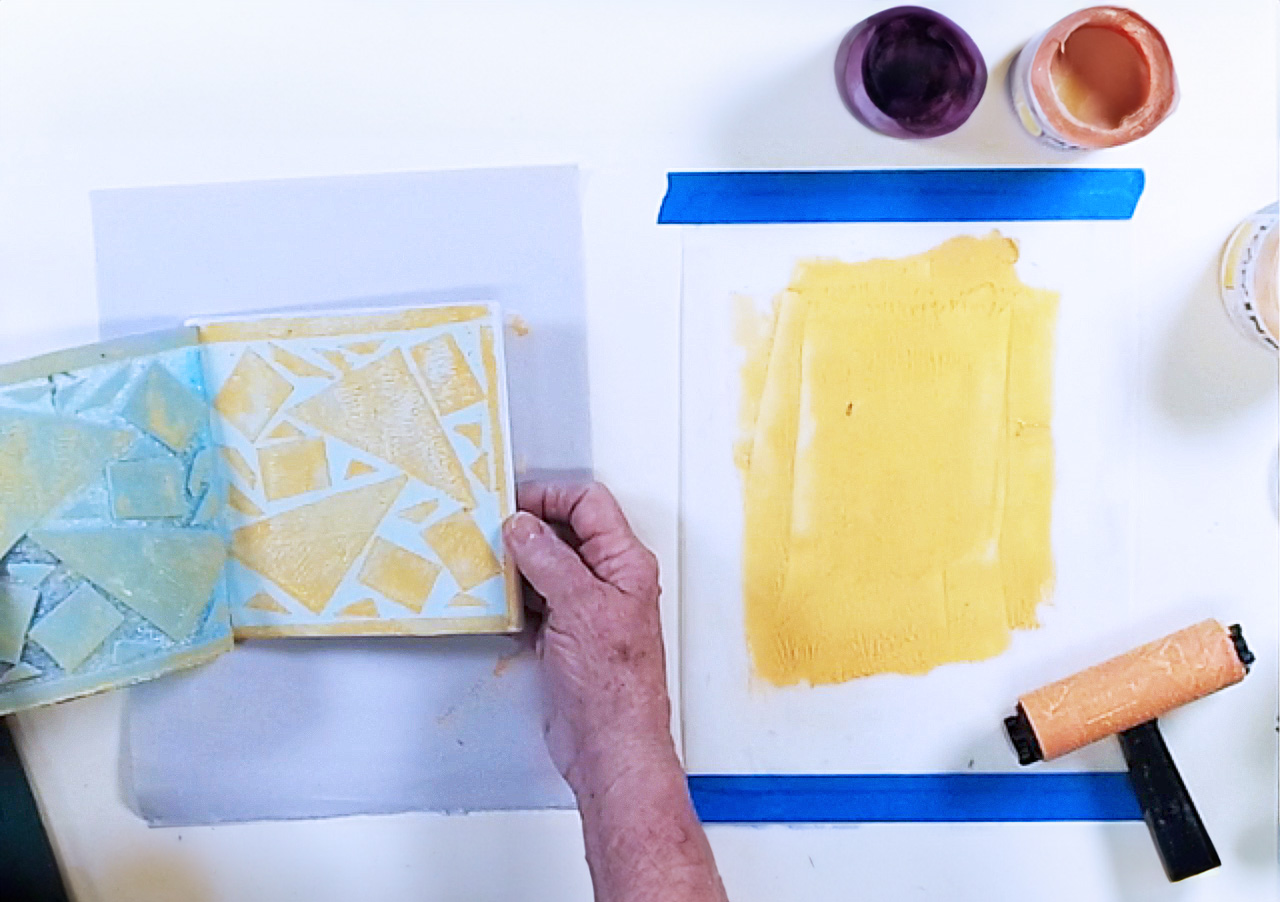
After pressing firmly on the back of the printing plate, carefully peel it off the tile.
Remove Small Shapes
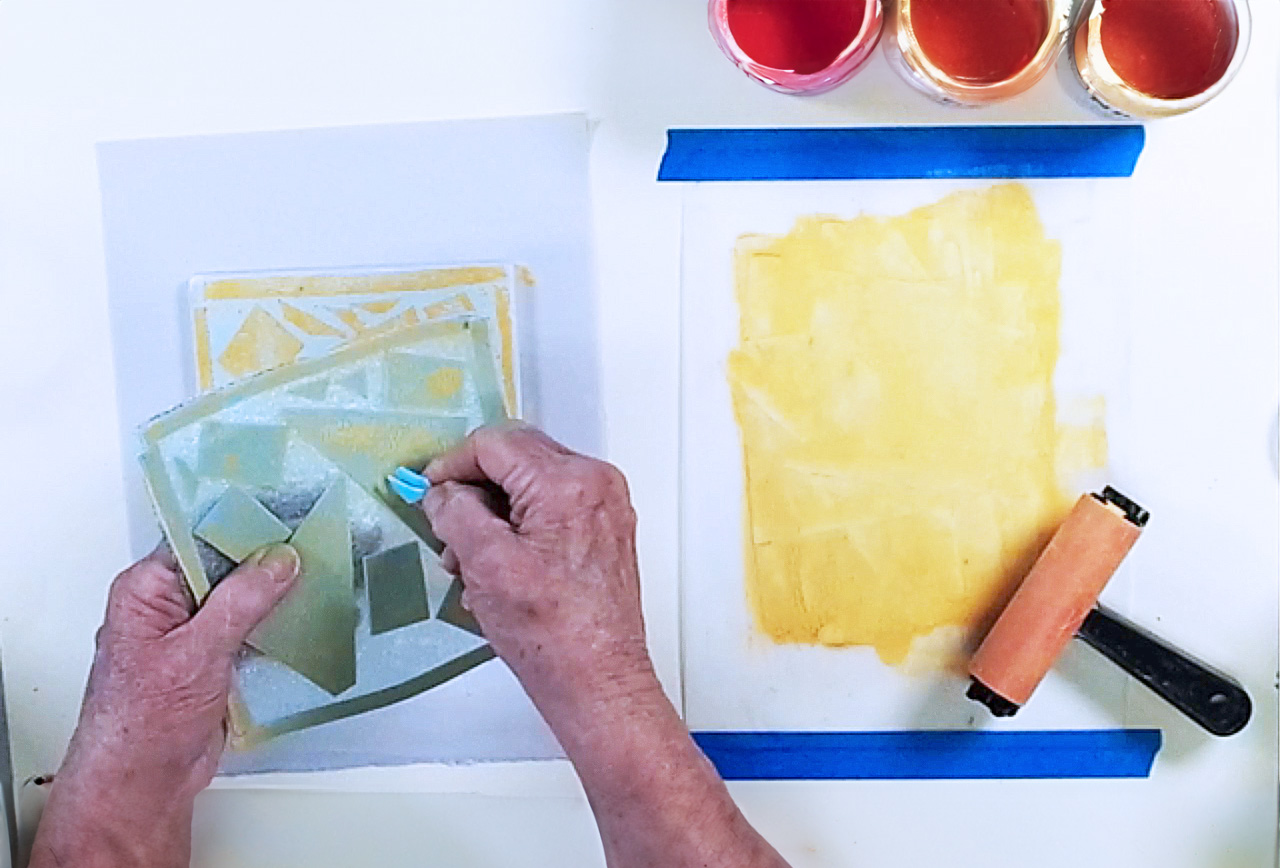
Remove the smallest shapes, they will remain the lightest color in the final print.
Print the Second Color
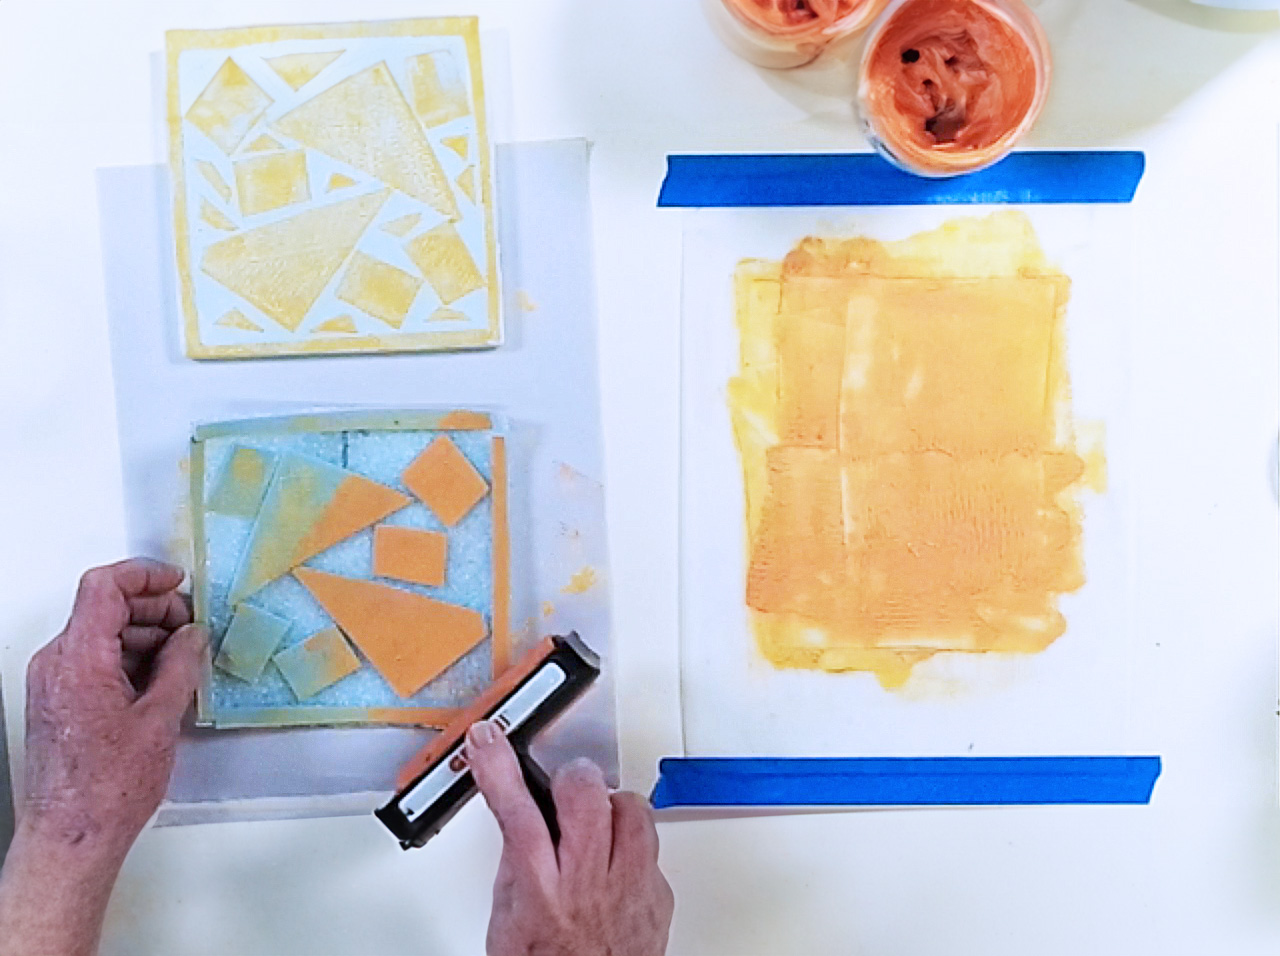
Ink the printing plate with the medium color, place face down on the tile, and repeat Step 9.
Quick Tip!
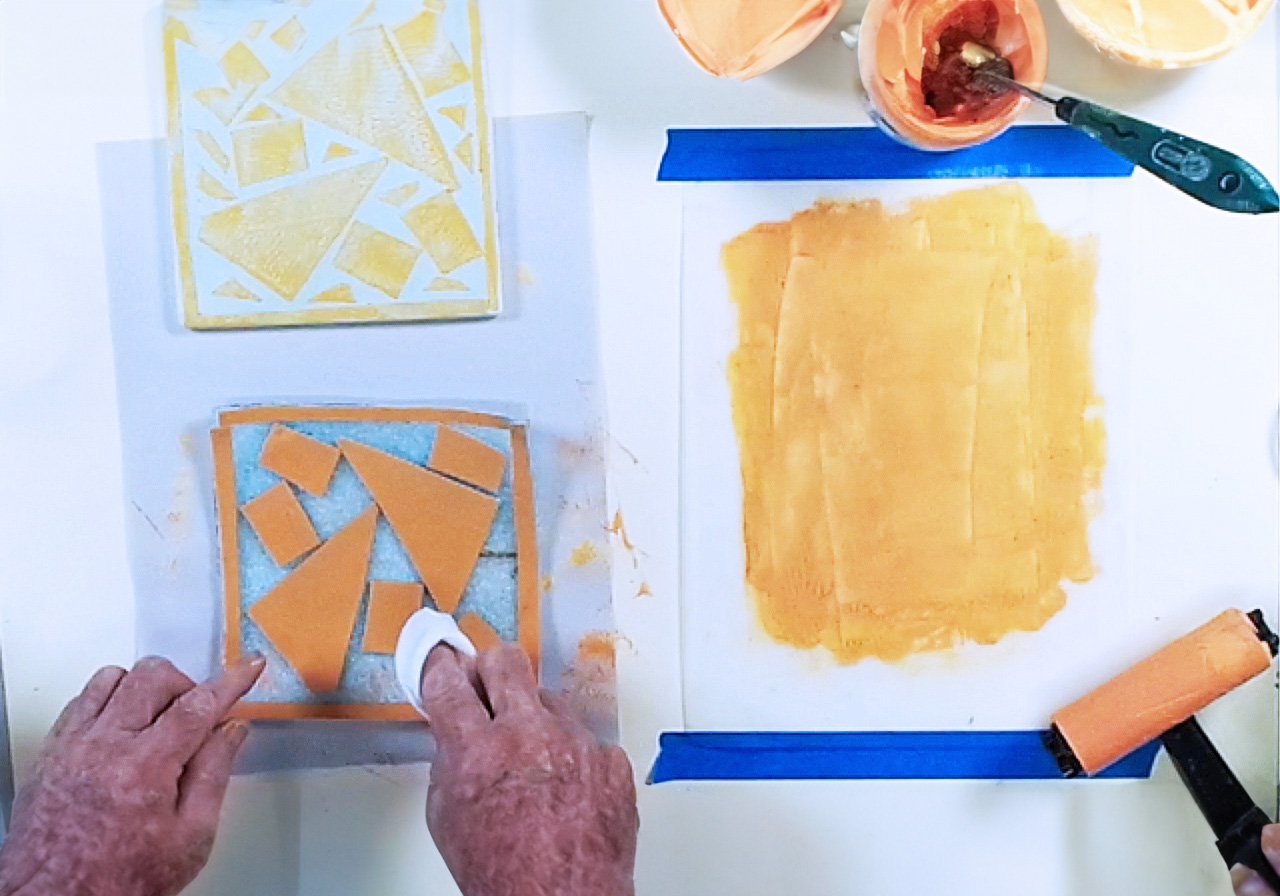
Use a baby wipe to clean any excess ink that gets on the packing foam.
Remove Medium Shapes
Remove medium size shapes, they will remain the medium color in the final print.
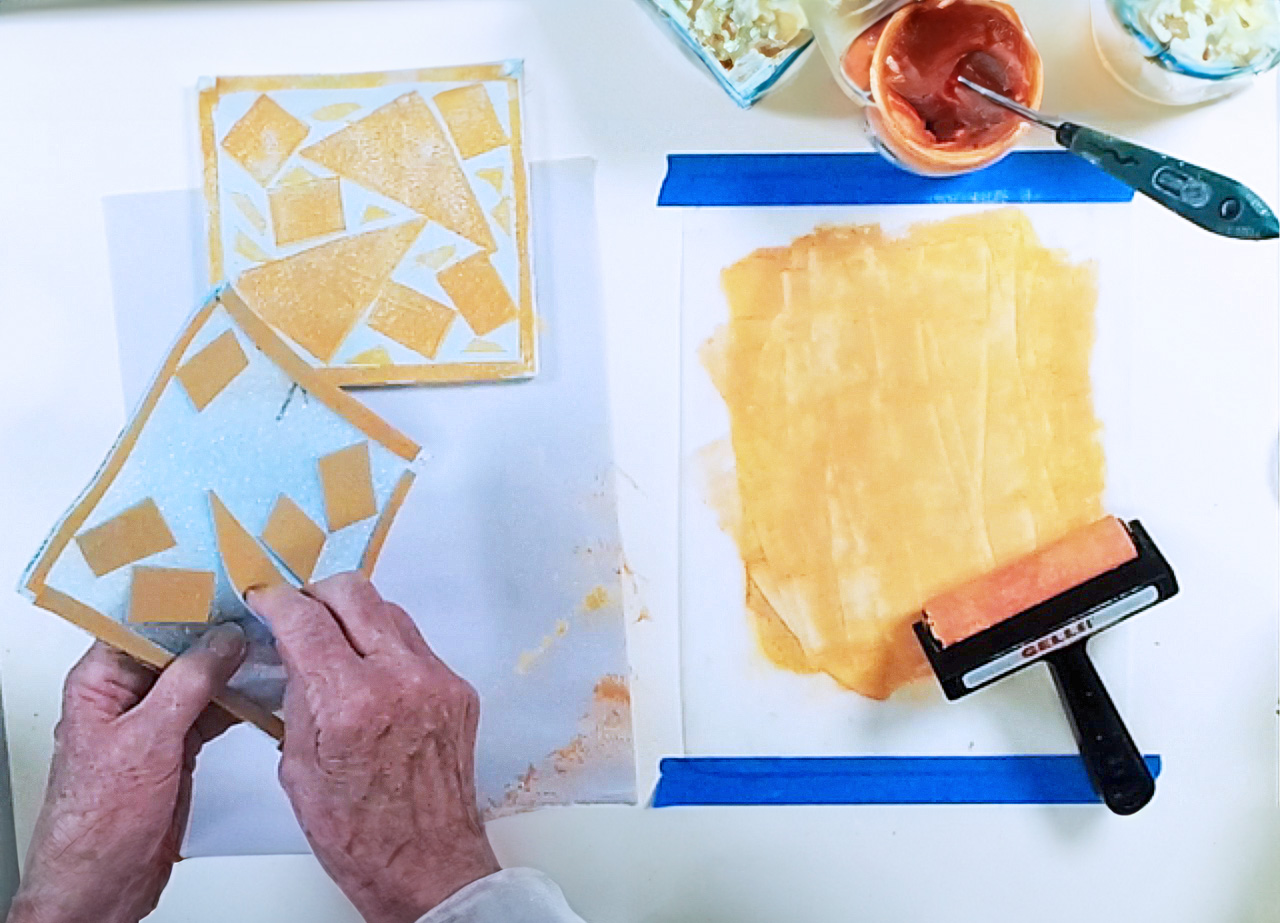
Print the Final Color
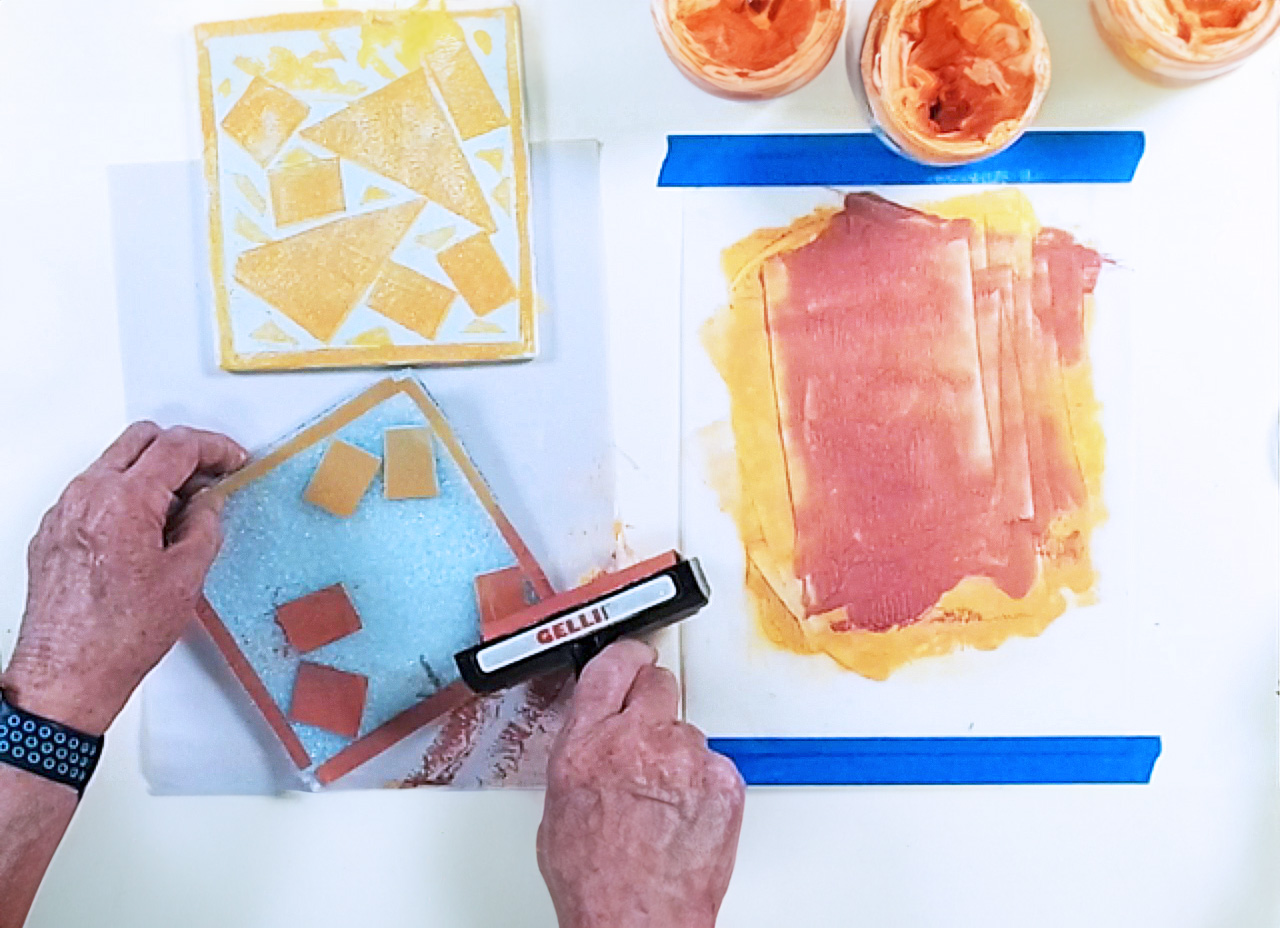
Ink the printing plate with the darkest color, place face down on the tile, and repeat Step 9.
Glaze & Fire
Remove the printing plate, let the ink dry, then apply AMACO LG-10 Clear Transparent Glaze and fire to cone 05.
Presentations
Download step-by-step slideshow presentations here:
Video
Similar Lesson Plans


